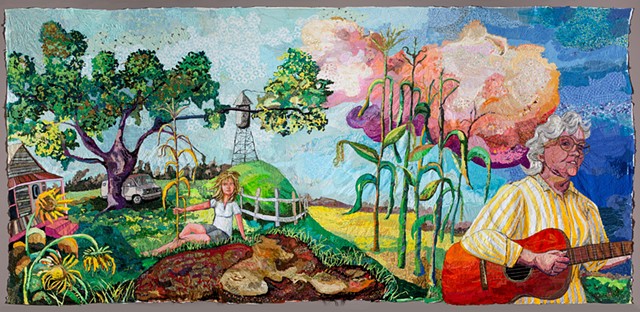
Fort Dirt Hole
I make work that ranges in greatly varying scales, from 4” x 6” works, to this piece, which is my largest narrative image made within a picture-plane format. (I’ve made larger works within a room-sized installation format, composed of the juxtaposition of multiple cut-out forms pinned to the walls.) This piece measures 13’ 4” x 27’ 4” and it takes up one whole wall within its present installation at the Ogden Museum of Southern Art…part of a mid-career survey of my work titled I Was Trying Hard To Think About Sweet Things.
My typical working methods are as follows: I start with small sketches. After settling on a final composition, I transfer the drawing onto transparencies and use an overhead projector to project the image onto plain white muslin. I redraw the image using Sharpie on the muslin and then I transfer the work to the floor so that I can use fluid, washy acrylic paint as an underpainting before I start the fabric work. The underpainting functions as a “map” for the piece. Otherwise, with very large works, I might get confused about which shape is which. Also, at this stage, I try to make strategic color choices that will inform my fabric color choices during the applique process. I try to make bold color choices knowing that little bits of the undercolor will show through in the finished piece. I usually photograph the underpainting on my studio wall, but this piece is so big, I had to take it outside and staple it onto the side of a house to get the whole image in one picture.
I use a longarm quilting machine to do the fabric applique process on the surface of the muslin. This particular piece is so large; I had to cut the piece into thirds to be able to fit in on to the quilting frame that works in tandem with the free-motion longarm. (The arm of the machine is 14” deep and it works on a frame that allows for 10 feet in width and much more in length, since the work rolls up onto the frame for relatively easy access over the whole surface of the work…I typically work left to right, top to bottom…but I often go back to areas already worked to fine tune.)
As I finished each panel, I would staple it up on the wall of my studio, which has 12’ ceilings. That way, I would be able to look over and match textures, colors and fabrics to the new edge of the new panel I was working. After finishing all three panels, I took the pieces outside and laid them out on the ground to see how the edges were meeting and take note of final adjustments I would have to make on the longarm. Finally, I was able to roll up each panel, laid out on my studio floor, and hand sew the edges together. I hand appliqued some fabrics onto the piece so that the meshing of the three panels would be less obvious. I didn’t get to see the whole finished piece until I hung it on the museum wall and, after being able to get some distance on the piece, even made a few changes by hand sewing some elements onto the surface as it was hanging.
